First published September 18, 2020; Upgrading OpenWRT added January 4, 2021.
Why?
I wanted to get to my WiFi router from the Internet, but didn’t want it serving the Internet. Putting it on a VPN is a good way to do this, and Tailscale makes VPNs easy enough to run and use that there’s no good reason not to.
When?
This past weekend. I’d just gotten back to Brooklyn and installed OpenWRT 19.07, which included a new enough kernel to support Wireguard.
This was possible before – Tailscale’s been shipping ARM builds for a while, and OpenWRT’s been shipping 19.07 for a while too – but I didn’t try it before now.
How?
I get out a MacBook Pro that I’ve already set up Tailscale on, and read through the Tailscale docs for setting up Tailscale with static binaries to know how the install is supposed to flow.
It probably won’t be possible to follow them exactly, because OpenWRT is different, so I start playing around.
Installing Tailscale on the router
I look up my router’s hardware specs, then find the tarball for my router in Tailscale’s stable track, and download it to my machine:
% curl -O https://pkgs.tailscale.com/stable/tailscale_1.0.5_arm.tgz
  % Total    % Received % Xferd  Average Speed   Time    Time     Time  Current
                                 Dload  Upload   Total   Spent    Left  Speed
100 11.9M  100 11.9M    0     0  3433k      0  0:00:03  0:00:03 --:--:-- 3433k
%Code language: JavaScript (javascript)
I’m not sure how much free RAM and flash I have on my router, but I know I haven’t installed anything else, and guess that 11.9M is relatively small enough that I don’t need to worry about it.
Warning
I haven’t been able to try this on any other routers, so I’m not sure when it’s safe to do this. If you want to follow along, proceed at your own risk.
So I copy the tarball over:
% scp tailscale_1.0.5_arm.tgz root@192.168.1.1:/tmpthen SSH to the router and try to unpack the tarball:
# cd /tmp
# tar xvf tailscale_1.0.5_arm.tgz
tar: invalid tar magic
# Code language: PHP (php)
and it doesn’t work. OpenWRT uses busybox tar, so I fumble around for a bit (xkcd.com/1168 applies) and eventually figure out:
# tar x -zvf tailscale_1.0.5_arm.tgzCode language: CSS (css)Then I try running the binaries to make sure they’re actually the right ones 😛 :
# cd tailscale_1.0.5_arm
# ./tailscale version
1.0.5-g31b5dec0a
# ./tailscaled --help
<...>Code language: PHP (php)
Looks it. Then I try to start tailscaled for real to figure out its dependencies.
# ./tailscaled
logtail started
Program starting: v1.0.5-g31b5dec0a, Go 1.14.4-ts56db765: []string{"/usr/sbin/tailscaled"}
LogID: 025f6648f94bcd1d40b0ee005ac472e123f7aeb2813874a71a7ba121da3d1827
logpolicy: using system state directory "/var/lib/tailscale"
2.6M/14.9M Starting userspace wireguard engine with tun device "tailscale0"
2.9M/16.6M Linux kernel version: 4.14.195
2.9M/16.8M is CONFIG_TUN enabled in your kernel? `modprobe tun` failed with:
2.9M/16.8M CreateTUN: can't create TUN device; /dev/net/tun does not exist
2.9M/16.8M wgengine.New: can't create TUN device; /dev/net/tun does not exist
flushing log.
logger closing down
logtail: dialed "log.tailscale.io:443" in 415ms
logtail: upload: log upload of 659 bytes compressed failed: Post "https://log.tailscale.io/c/tailnode.log.tailscale.io/0055d7ffaa6c80ecda7fef05574c36d025a42ead7d7409fce3b7218f84628e4a": x509: certificate signed by unknown authority
logtail: backoff: 12 msec
logtail: dialed "log.tailscale.io:443" in 413ms
logtail: upload: log upload of 659 bytes compressed failed: Post "https://log.tailscale.io/c/tailnode.log.tailscale.io/0055d7ffaa6c80ecda7fef05574c36d025a42ead7d7409fce3b7218f84628e4a": context canceled
#Code language: PHP (php)
There are many lines of error messages but really two errors:
`modprobe tun` failedmeans that Tailscale asked the kernel for a TUN device and got back “huh?”x509: certificate signed by unknown authoritymeans that Tailscale tried to make a TLS connection but couldn’t figure out who was on the other end. When this happens with professional software (like Tailscale) it usually means no certificates are installed at all.
Both of these are pretty standard things to get from a package manager, but everyone calls them different names. I poke around OpenWRT’s packages and determine I probably need kmod-tun and ca-bundle, so I install them and try again.
# opkg update
# opkg install ca-bundle kmod-tunCode language: PHP (php)
After this, tailscaled is able to start:
# ./tailscaled
<...>Code language: HTML, XML (xml)
so I copy it to Flash.
# cp tailscale tailscaled /usr/sbinCode language: PHP (php)Running as a service
Tailscale comes with a simple systemd unit file. OpenWRT can’t use this directly, since it uses procd instead. I read the procd docs and, after about an hour of trial and error, port enough of it to get things working:
#!/bin/sh /etc/rc.common

# Copyright 2020 Google LLC.
# SPDX-License-Identifier: Apache-2.0

USE_PROCD=1
START=80

start_service() {
  /usr/sbin/tailscaled --cleanup

  procd_open_instance
  procd_set_param command /usr/sbin/tailscaled

  # Set the port to listen on for incoming VPN packets.
  # Remote nodes will automatically be informed about the new port number,
  # but you might want to configure this in order to set external firewall
  # settings.
  procd_append_param command --port 41641

  # OpenWRT /var is a symlink to /tmp, so write persistent state elsewhere.
  procd_append_param command --state /etc/tailscale/tailscaled.state

  procd_set_param respawn
  procd_set_param stdout 1
  procd_set_param stderr 1

  procd_close_instance
}

stop_service() {
  /usr/sbin/tailscaled --cleanup
}Code language: PHP (php)
Also available as a GitHub Gist.
It’s my first time working with procd, so I’m pretty happy with how it turned out.
Gists have awkwardly long URLs, so I make a redirect to it that will let me download it with a short URL and upload it to my router easily:
% curl -LO https://willangley.org/tailscale-procd
% less tailscale-procd
% scp tailscale-procd root@192.168.1.1:/tmpCode language: JavaScript (javascript)
I SSH to the router, install the init script, and run it to start tailscaled.
# cp /tmp/tailscale-procd /etc/init.d/tailscale
# chmod +x /etc/init.d/tailscale
# /etc/init.d/tailscale startCode language: PHP (php)
Log in to Tailscale
Once tailscaled is running, I run
# tailscale upCode language: PHP (php)to get a login link, and click it to log in.
After logging in, I go to the Tailscale admin console and look for my router’s hostname; since I’ve never changed it, it’s OpenWRT.
I copy its IP address and make sure I can ping it from the machine I’m working from. (This would fail if the machine wasn’t on Tailscale, or was on a different Tailscale network.)
% ping 100.114.61.77
PING 100.114.61.77 (100.114.61.77): 56 data bytes
64 bytes from 100.114.61.77: icmp_seq=0 ttl=64 time=43.378 ms
64 bytes from 100.114.61.77: icmp_seq=1 ttl=64 time=7.895 ms
64 bytes from 100.114.61.77: icmp_seq=2 ttl=64 time=7.046 ms
64 bytes from 100.114.61.77: icmp_seq=3 ttl=64 time=5.387 ms
^C
--- 100.114.61.77 ping statistics ---
4 packets transmitted, 4 packets received, 0.0% packet loss
round-trip min/avg/max/stddev = 5.387/15.926/43.378/15.875 msCode language: JavaScript (javascript)
Once I confirm the connection works, I disable key expiry for the router to avoid it falling off of my network.
Surviving reboot
Now that I know it’s working, I enable the Tailscale service so it launches on every boot.
# /etc/init.d/tailscale enableCode language: PHP (php)And check to make sure it has succeeded:
# ls /etc/rc.d/*tailscale
/etc/rc.d/S80tailscaleCode language: PHP (php)
This took me several tries to get right, because I forgot to add the START=80 variable to my init script; without it, OpenWRT didn’t know where to link it into the startup order.
But now that it’s there, I’m good to go! At least until the next sysupgrade. If we don’t do anything all of this will get wiped away.
Upgrading OpenWRT
Added January 4, 2021
Yes! It is, in fact, possible to upgrade in-place with Tailscale. Keeping Tailscale around solves half of this, and only needs to be set up one time.
Providing its dependencies in an upgrade image solves the other half. This needs to be done for each upgrade, because of how OpenWRT works.
Warning
Unlike other Linux distributions, installing an OpenWRT upgrade image wipes away packages that aren’t in the upgrade image. If you install an image from the OpenWRT Downloads page it will wipe away the dependencies we installed earlier and Tailscale will fail to start.
I forgot this and broke Tailscale while I was figuring this part out too.
Keeping Tailscale around
Reading the CLI upgrade docs shows there’s a config directory, /lib/upgrade/keep.d/, that holds lists of files to keep through sysupgrades. The format isn’t documented, but it looks a lot like “one file or directory a line,” and I create /lib/upgrade/keep.d/tailscale with all of the files above:
/etc/init.d/tailscale
/etc/rc.d/*tailscale
/etc/tailscale/
/lib/upgrade/keep.d/tailscale
/usr/sbin/tailscale
/usr/sbin/tailscaled
OpenWRT doesn’t use globs in any of the files in the base image, but they seem to work; testing with sysupgrade -l shows that all the files above are now included in the backup.
Building an OpenWRT image with our dependencies
To make the packages we need available after an upgrade, I’ll make a custom image with those packages using Image Builder. This is much quicker than building from source, O(45 seconds) with a fast network connection. I like fast when I can get it.
Both Image Builder and the targets it contains are specific to your WiFi router. I’m, once again, only going to show what I did for mine.
On Mac
I’ve already set up my Mac with the keys to verify OpenWRT images, so I:
- download Image Builder there
- verify it (not shown)
- then transfer it to an Ubuntu VM I’m already running under Multipass for WordPress development
% curl -LO https://downloads.openwrt.org/releases/19.07.5/targets/ipq806x/generic/openwrt-imagebuilder-19.07.5-ipq806x-generic.Linux-x86_64.tar.xz
% # verify image (snipped)
% multipass transfer openwrt-imagebuilder-19.07.5-ipq806x-generic.Linux-x86_64.tar.xz primary:Code language: PHP (php)
On Linux
- install Image Builder’s prerequisites
- unpack Image Builder
- figure out my WiFi router’s profile with
make info - build an image with the packages we’ll need for the install (and LuCI, it’s not included by default)
- print out where it wound up
$ sudo apt install build-essential libncurses5-dev libncursesw5-dev
zlib1g-dev gawk git gettext libssl-dev xsltproc wget unzip python
$ tar xvf openwrt-imagebuilder-19.07.5-ipq806x-generic.Linux-x86_64.tar.xz
$ cd openwrt-imagebuilder-19.07.5-ipq806x-generic.Linux-x86_64/
$ make info
$ export LUCI_PACKAGES="uhttpd uhttpd-mod-ubus libiwinfo-lua luci-base luci-app-firewall luci-mod-admin-full luci-theme-bootstrap"
$ make image PROFILE=netgear_r7800 PACKAGES="ca-bundle kmod-tun $LUCI_PACKAGES"
$ cd bin/targets/ipq806x/generic/
$ realpath openwrt-19.07.5-ipq806x-generic-netgear_r7800-squashfs-sysupgrade.bin
/home/ubuntu/openwrt-imagebuilder-19.07.5-ipq806x-generic.Linux-x86_64/bin/targets/ipq806x/generic/openwrt-19.07.5-ipq806x-generic-netgear_r7800-squashfs-sysupgrade.binCode language: JavaScript (javascript)
On Mac
Finally, I copy the built image back to my Mac.
% multipass transfer primary:/home/ubuntu/openwrt-imagebuilder-19.07.5-ipq806x-generic.Linux-x86_64/bin/targets/ipq806x/generic/openwrt-19.07.5-ipq806x-generic-netgear_r7800-squashfs-sysupgrade.bin .Code language: JavaScript (javascript)Flashing the custom image
Flashing a custom image works the same way as prebuilt ones. In fact, there’s no difference in the UI. If you’ve worked with both you’ll need to take care to not install a prebuilt image by mistake and break Tailscale.
I upload the image to my router with LuCI, make sure it looks like it’s the right size (it should be slightly larger than the image from the Downloads page for my router; when it was smaller, it meant I’d forgotten LuCI), and that the SHA256 sum does not appear on the Downloads page for my router (which would verify I’m about to break Tailscale.)
I leave the option to keep settings and retain the current configuration selected, and click Continue.
A few minutes later my WiFi router comes back up and Tailscale does too ?.
Repeat
I’ll need to repeat building a custom OpenWRT image with our dependencies and flashing the custom image for each future OpenWRT upgrade.
Future Work
Updated January 4, 2021
There’s an open Tailscale issue, tailscale/tailscale#724, to package Tailscale for OpenWRT. If this happens soon, there won’t be much to do here 🙂
✅ If it takes longer, I’ll probably try to get OpenWRT to not wipe this away with a sysupgrade – I think this’ll involve some combination of editing /etc/sysupgrade.conf and using sysupgrade -k on future upgrades.
It’s possible to bake Tailscale into the image with the FILES= argument to Image Builder, supplying a Tailscale pre-authenticated key to establish the connection. This should be O(hours) to do as a one off, and I might try this for a future OpenWRT upgrade.
Google Cloud Build makes these sorts of builds easy to automate, and I could probably do so with O(days) work. But this still seems like overkill unless I wind up with a fleet of these somehow.
Appendix
I broke my router’s firmware once doing this.
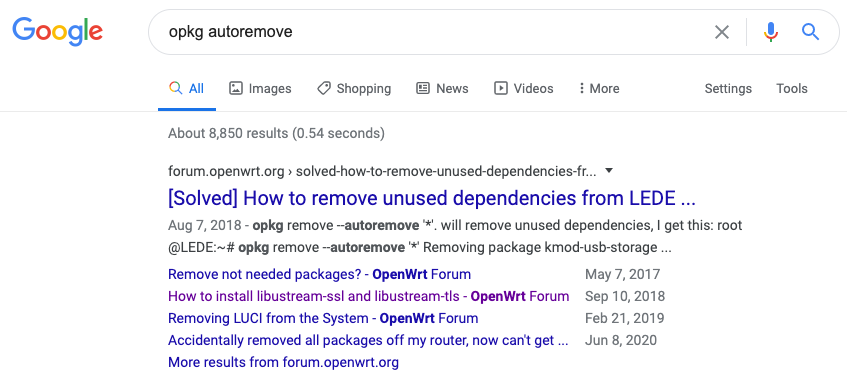
It wasn’t even a step that I needed to do; I was trying to figure out how much space I’d consumed with packages, and ran a command from a snippet in a Google search that was supposed to remove unused packages without clicking it to read the rest of the page.
DANGER
Seriously, never do this.
The snippet looked reasonable, but if I’d clicked in, I would have seen the command I was about to run was going to remove the WiFi drivers.
But as I said, I didn’t, and wound up needing to rummage for a USB-to-Ethernet adapter and Ethernet cable to reinstall my firmware.

